Enquiry

Appliance Refurbishment for a Sustainable Home: How to Make a Difference

The blog explores the significance of appliance refurbishment in fostering sustainability within the home environment. It begins by outlining the environmental impact of household appliances, emphasizing their role in energy consumption, resource depletion, and waste generation. With this context in mind, the blog makes a compelling case for appliance refurbishment as a sustainable alternative to constant replacement. By repairing, restoring, and upgrading existing appliances, homeowners can extend their lifespan, minimize waste, and conserve resources. The practice of refurbishment aligns with principles of the circular economy, where products are kept in use for as long as possible, reducing the need for new production and disposal. The blog emphasizes three key reasons why appliance refurbishment is essential for creating a sustainable home: waste reduction, resource conservation, and energy savings. Refurbishing appliances keeps them out of landfills, reducing electronic waste and its associated environmental impacts. It also decreases the demand for new appliances, thereby conserving valuable resources and mitigating the environmental impact of resource extraction and processing. Moreover, refurbishment often involves upgrading components to improve energy efficiency, resulting in lower energy consumption and reduced carbon emissions. To empower readers to engage in appliance refurbishment, the blog provides practical tips for getting started. It suggests starting small with simpler refurbishment projects and investing in quality tools and equipment. Consulting experts or professional technicians can offer valuable guidance, especially for more complex issues. Additionally, prioritizing energy efficiency during refurbishment and practicing responsible disposal for appliances that cannot be refurbished are emphasized as important steps in promoting sustainability. Ultimately, the blog highlights appliance refurbishment as a tangible way for homeowners to make a difference in creating a sustainable living environment. By embracing refurbishment practices, individuals can contribute to waste reduction, resource conservation, and energy efficiency within their homes. Moreover, the blog encourages readers to reconsider their approach to appliance maintenance and replacement, emphasizing the environmental and economic benefits of extending the lifespan of existing appliances. So, hence, the appliance refurbishment emerges as a practical and impactful strategy for promoting sustainability within the home. Through repair, restoration, and responsible disposal, homeowners can play a vital role in reducing their environmental footprint and fostering a more sustainable future.


In the era of climate change and environmental degradation, sustainability has become a paramount concern for homeowners worldwide. From reducing energy consumption to minimizing waste, individuals are increasingly seeking ways to lessen their environmental footprint. One often-overlooked avenue for promoting sustainability at home is appliance refurbishment. In this blog, we’ll explore the importance of appliance refurbishment in creating a sustainable home and provide practical tips on how to make a difference through refurbishment projects.

The environmental impact of appliances

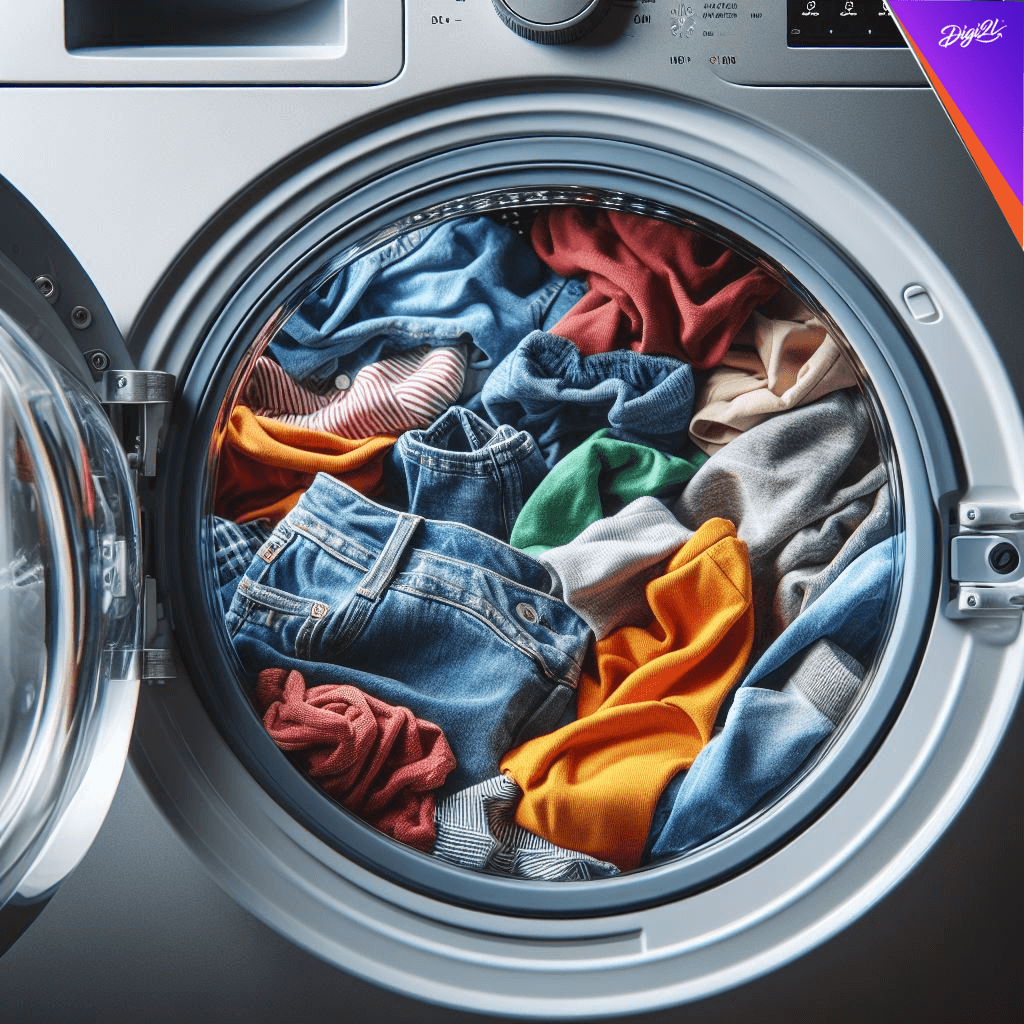
Household appliances play a significant role in our daily lives, from refrigerators and washing machines to dishwashers and air conditioners. However, the production, use, and disposal of appliances contribute to various environmental challenges, including resource depletion, pollution, and greenhouse gas emissions. According to the International Energy Agency (IEA), the household sector accounts for a significant portion of global energy consumption and greenhouse gas emissions, with appliances being a major contributor. Additionally, the manufacturing process for new appliances requires substantial amounts of raw materials and energy, further exacerbating environmental pressures.

The case of appliance refurbishment

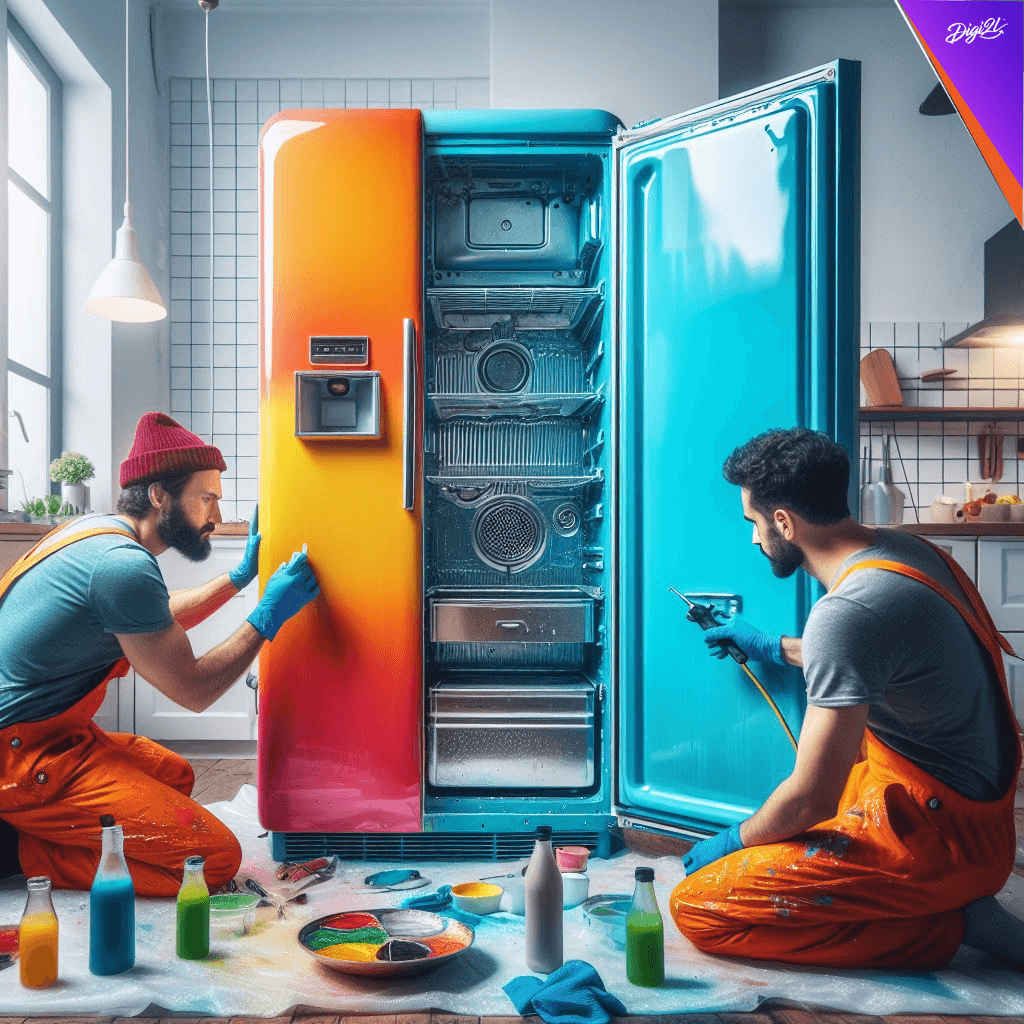
Appliance refurbishment offers a sustainable alternative to the constant cycle of buying and discarding appliances. By repairing, restoring, and upgrading existing devices, homeowners can extend their lifespan, reduce waste, and conserve resources. Here’s why appliance refurbishment is essential for creating a sustainable home:

  • Waste reduction : Refurbishing appliances keeps them out of landfills, minimizing electronic waste (e-waste) and its associated environmental impacts. Instead of disposing of appliances when they break down or become outdated, refurbishment provides an opportunity to give them a second life.
  • Resource conservation : Refurbishment reduces the demand for new appliances and the extraction of raw materials, such as metals, plastics, and rare earth elements. By preserving existing resources, refurbishment helps mitigate the environmental impact of resource extraction and processing.
  • Energy savings : Older appliances may not be as energy-efficient as newer models, but refurbishment often involves upgrading components to improve efficiency. By refurbishing and using these appliances instead of buying new ones, homeowners can reduce energy consumption and lower their carbon footprint.


Practical tips for appliance refurbishment : Refurbishing appliances may seem daunting at first, but with the right knowledge and tools, it can be a rewarding and eco-friendly endeavor. Here are some practical tips for refurbishing appliances and making a difference in your sustainable home:

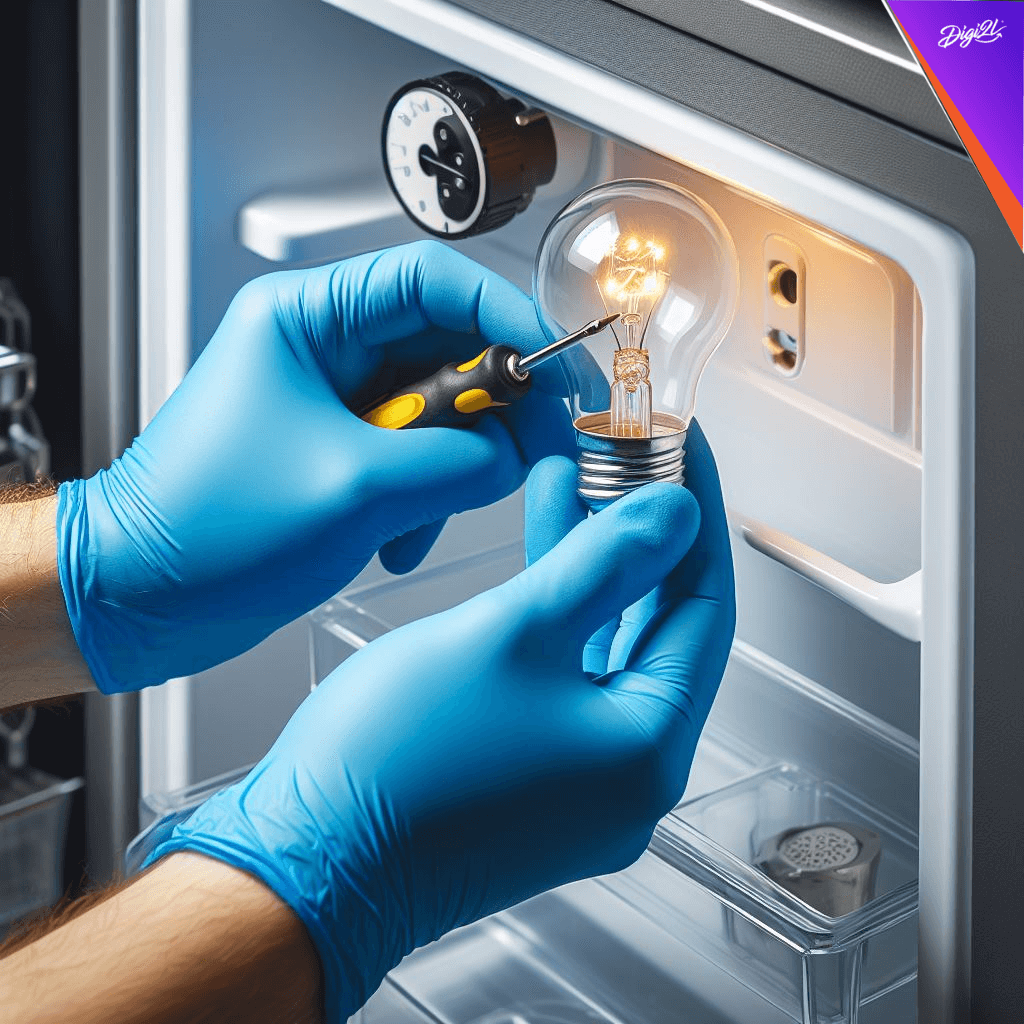
  • Start small : Begin by tackling simpler refurbishment projects, such as repairing minor issues or replacing worn-out parts. Online tutorials and DIY guides can provide helpful instructions and guidance for beginners.
  • Invest in quality tools : To effectively refurbish appliances, you’ll need the right tools and equipment, including screwdrivers, wrenches, multi meters, and replacement parts. Investing in quality tools will make the refurbishment process easier and more efficient.
  • Consult experts : If you’re unsure about how to refurbish a particular appliance or encounter complex issues, don’t hesitate to seek help from professional technicians or repair experts. They can offer valuable advice and assistance in diagnosing and fixing problems.
  • Prioritize energy efficiency : When refurbishing appliances, consider ways to improve their energy efficiency, such as replacing old components with newer, more efficient ones or adjusting settings to optimize performance. Energy-efficient appliances not only save money on utility bills but also reduce environmental impact.
  • Practice responsible disposal : If refurbishment is not feasible or cost-effective for a particular appliance, ensure responsible disposal by recycling or donating it to organizations that accept old appliances. Proper disposal ensures that valuable materials are recovered and reused, minimizing environmental harm.


       Appliance refurbishment plays a crucial role in creating a sustainable home and reducing our environmental footprint. By extending the lifespan of appliances through repair, restoration, and upgrades, homeowners can minimize waste, conserve resources, and lower energy consumption. With practical tips and a commitment to sustainability, anyone can make a difference through appliance refurbishment. So, the next time you encounter a malfunctioning appliance or consider upgrading to a new model, think twice about the environmental impact and explore the possibility of refurbishment—it’s a small step that can make a big difference in creating a more sustainable future.


Case Studies: Successful Appliance Refurbishment Projects and Their Impact

The blog delves into the impact of successful appliance refurbishment projects through three compelling case studies. Firstly, it explores the Community Repair Café in the Netherlands, where volunteers assist residents in fixing broken appliances. The café not only saves money for individuals but also reduces community waste and promotes a culture of repair and reuse. Secondly, the blog highlights corporate refurbishment initiatives undertaken by a leading electronics manufacturer. By refurbishing returned or defective appliances instead of discarding them, the company not only minimizes waste but also offers affordable options to consumers while contributing to a more circular economy. Lastly, it features the story of Sarah, who embarked on a DIY appliance refurbishment project. Sarah’s determination and resourcefulness in repairing her old refrigerator not only saved her money but also inspired others in her community to take a similar approach to appliance maintenance and repair. Through these case studies, the blog illustrates the multifaceted benefits of appliance refurbishment. It emphasizes waste reduction, cost savings, environmental conservation, and community engagement as key outcomes of successful refurbishment projects. Whether driven by community activism, corporate responsibility, or individual initiative, refurbishing appliances emerges as a practical and impactful solution to the challenges of waste generation and resource depletion. Ultimately, the blog positions appliance refurbishment as a beacon of hope in the quest for sustainability and resilience. Each refurbishment project, whether small-scale or large-scale, contributes to a larger movement toward a more sustainable and equitable future, where repair and reuse take precedence over consumption and waste. 

In the pursuit of sustainability and cost-effectiveness, appliance refurbishment has emerged as a viable solution to extend the lifespan of household devices. Through repair, restoration, and upgrades, individuals and organizations have been able to breathe new life into old appliances, reducing waste and conserving resources. In this blog, we’ll explore several case studies of successful appliance refurbishment projects and examine their impact on both the environment and the community.

Case study 1 : The community repair café

In a small town in the Netherlands, a group of enthusiastic volunteers established a community repair café with the aim of promoting repair and reuse. The café provided a space where residents could bring in their broken appliances and receive assistance from skilled volunteers to repair them. One notable success story from the repair café involved a malfunctioning washing machine. Instead of discarding it and purchasing a new one, the owner brought it to the café, where volunteers diagnosed and fixed the issue—a faulty belt. With a simple replacement part and a few adjustments, the washing machine was back in working order, saving the owner both money and the environmental cost of disposal. The impact of the repair café extended beyond individual appliances. By fostering a culture of repair and reuse, the initiative reduced the community’s overall waste output and empowered residents to take a proactive approach to sustainability.

Case study 2 : Corporate refurbishment initiatives

Large corporations have also embraced appliance refurbishment as part of their sustainability efforts. One such example is a leading electronics manufacturer that implemented a refurbishment program for returned or defective appliances. Instead of sending these appliances to landfills or recycling centers, the company invested in refurbishment facilities where trained technicians repaired and restored them to like-new condition. These refurbished appliances were then sold at a discounted price, providing affordable options for consumers while reducing waste and minimizing the environmental impact of manufacturing new products. The success of this refurbishment program not only demonstrated the economic and environmental benefits of refurbishment but also set a precedent for other companies to follow suit. By integrating refurbishment into their business model, corporations can contribute to a more circular economy and mitigate the environmental consequences of consumerism.

Case study 3: DIY Appliance refurbishment

For individuals with the necessary skills and knowledge, do-it-yourself (DIY) appliance refurbishment projects offer a cost-effective and rewarding way to extend the lifespan of household devices. One such DIY enthusiast, Sarah, took on the challenge of refurbishing her old refrigerator. Instead of replacing the refrigerator when it started showing signs of wear and tear, Sarah decided to roll up her sleeves and tackle the repairs herself. With the help of online tutorials and guidance from experienced DIYers, she identified and fixed various issues, including a faulty compressor and worn-out seals. Through perseverance and resourcefulness, Sarah was able to restore her refrigerator to full functionality, saving herself the expense of purchasing a new appliance and reducing her environmental footprint in the process. Her experience inspired others in her community to take a similar approach to appliance maintenance and repair, fostering a sense of empowerment and resilience in the face of consumerism.

The collective impact of appliance refurbishment

These case studies highlight the diverse ways in which appliance refurbishment can make a positive impact on both individuals and communities. Whether through community-led initiatives, corporate refurbishment programs, or individual DIY projects, refurbishing appliances offers numerous benefits:

  • Waste reduction : By diverting appliances from landfills and extending their lifespan, refurbishment reduces the amount of electronic waste generated and conserves valuable resources.
  • Cost savings : Refurbishing appliances is often more cost-effective than purchasing new ones, saving consumers money in the long run and providing affordable options for those on a tight budget.
  • Environmental conservation : By reducing the demand for new appliances and minimizing the energy and resources required for manufacturing and disposal, refurbishment helps mitigate the environmental impact of consumerism.
  • Community engagement : Initiatives such as repair cafés and DIY refurbishment projects foster a sense of community and empowerment, encouraging individuals to take an active role in promoting sustainability and resourcefulness.


        The case studies presented in this blog underscore the transformative potential of appliance refurbishment in promoting sustainability and resilience. Whether driven by community activism, corporate responsibility, or individual ingenuity, refurbishing appliances offers a tangible solution to the challenges of waste generation and resource depletion. As we continue to confront the environmental and economic consequences of consumerism, appliance refurbishment serves as a beacon of hope—a reminder that by working together and thinking creatively, we can build a more sustainable and equitable future. Whether it’s repairing a broken washing machine, refurbishing returned appliances, or embarking on a DIY project, each act of refurbishment contributes to a larger movement toward a circular economy and a healthier planet for future generations. Hence, purchasing second hand refurbished Air conditioners, washing machines, refrigerators, LED and Smart TVs are all a very good and sustainable option to go for on Digi2lstore.com! Happy shopping!!!

Unlocking the Secrets: Prolonging Fabric Lifespan Through Washing Machine Care

In our fast-paced world, where convenience often trumps longevity, caring for our clothing takes a backseat. Yet, the way we wash our fabrics plays a pivotal role in determining their lifespan. This overview encapsulates the essence of prolonging fabric longevity through mindful washing machine care. Fabric lifespan hinges on various factors, including fiber type, weave, and laundering methods. Selecting the right washing machine is crucial; front-loaders are gentler on fabrics than top-loaders, minimizing wear and tear. Temperature also matters; cold or lukewarm water preserves colors and prevents fiber damage. Detergent choice is paramount; harsh chemicals weaken fibers over time. Opting for mild, eco-friendly detergents and avoiding detergent overload ensures gentle yet effective cleaning. Delicate fabrics require special attention, necessitating the use of gentle wash cycles and mesh laundry bags for added protection. Proper sorting prevents color bleeding and abrasion, while regular maintenance ensures optimal washing machine performance. Cleaning the lint filter and door seal and running empty cycles with vinegar or baking soda eliminate odors and detergent residue. Air drying surpasses the convenience of a dryer; hanging garments away from direct sunlight maintains color vibrancy and fiber integrity. Quality garments, though initially pricier, boast durability and longevity, making them a sustainable investment. Ultimately, each step taken towards fabric care contributes to a more responsible approach to fashion consumption. From mindful detergent selection to gentle washing cycles and air drying, these practices not only preserve fabric lifespan but also promote sustainability in the fashion industry. So, the next time you load your washing machine, remember the profound impact of your choices on the longevity of your garments.

In our fast-paced world, we often overlook the importance of caring for our everyday essentials, particularly our clothing. Our reliance on washing machines is undeniable, yet how often do we consider the impact of this appliance on the lifespan of our beloved fabrics? In this guide, we delve into the art of prolonging fabric lifespan through proper washing machine care, unveiling simple yet effective methods to ensure your garments stand the test of time.

Understanding fabric lifespan :  Before delving into washing machine care, it’s crucial to comprehend the factors that contribute to the deterioration of fabrics over time. Fabric lifespan is influenced by various elements, including fiber type, weave, dyeing process, and laundering methods. While some fabrics are inherently more durable than others, proper care can significantly extend their longevity.

Choosing the right washing machine : The journey to prolonging fabric lifespan begins with selecting the appropriate washing machine. Front-loading machines are generally gentler on fabrics compared to their top-loading counterparts. The tumbling action of front-loaders minimizes friction and reduces wear and tear on garments, making them an ideal choice for prolonging fabric lifespan.

Temperature matters : Temperature plays a pivotal role in the washing process, impacting both cleanliness and fabric integrity. While hot water is effective in removing tough stains, it can also cause colors to fade and fabrics to shrink. Opting for cold or lukewarm water not only preserves the vibrancy of colors but also prevents unnecessary stress on fibers, thereby prolonging fabric lifespan.

Mindful Detergent Selection :  The detergent you choose can make a world of difference in the longevity of your fabrics. Harsh chemicals found in some detergents can weaken fibers over time, leading to premature wear and tear. Opt for mild, eco-friendly detergents specifically formulated for delicate fabrics. Additionally, avoid overloading the washing machine with detergent, as excess soap residue can accumulate on fabrics, diminishing their quality over time.

Gentle cycle for Delicate fabrics : When it comes to delicate fabrics such as silk, wool, or lace, a gentle touch is paramount. Selecting the appropriate wash cycle can prevent unnecessary stress and damage to these sensitive materials. Most modern washing machines offer dedicated cycles for delicate fabrics, utilizing slower agitation and shorter spin cycles to safeguard their integrity. Investing in a mesh laundry bag for delicate items adds an extra layer of protection during the washing process.

Mindful sorting : Proper sorting is often overlooked but can significantly impact fabric lifespan. Separating garments based on color, fabric type, and level of soiling prevents color bleeding and minimizes abrasion during the wash cycle. Dark and light-colored garments should be washed separately to prevent dye transfer, while heavily soiled items may require pre-treatment to ensure thorough cleaning without compromising fabric integrity.

Preventive maintenance : Regular maintenance of your washing machine is essential to ensure optimal performance and prolong fabric lifespan. Clean the machine’s lint filter and door seal regularly to prevent debris buildup, which can harbor bacteria and affect cleaning efficiency. Additionally, periodically run an empty cycle with vinegar or baking soda to eliminate odors and remove detergent residue from the machine’s interior.

Opt for air drying : While the convenience of a dryer is undeniable, air drying is gentler on fabrics and can significantly extend their lifespan. Hang garments on a clothesline or drying rack away from direct sunlight to prevent color fading and fiber degradation. For delicate items, reshape them while damp and lay them flat to dry to maintain their original shape and texture.

Invest in quality : Quality garments are an investment worth making, as they are often constructed from durable fabrics and designed to withstand repeated washing. Prioritize garments made from natural fibers such as cotton, linen, and wool, which tend to be more resilient than synthetic alternatives. While the upfront cost may be higher, the longevity of quality garments far outweighs the short-term savings of cheaper alternatives.

In a world inundated with fast fashion and disposable goods, the importance of prolonging fabric lifespan cannot be overstated. By adopting simple yet effective washing machine care practices, you can ensure that your garments remain vibrant, clean, and durable for years to come. From mindful detergent selection to gentle washing cycles and air drying, every step you take towards fabric care contributes to a more sustainable and responsible approach to fashion consumption. So, the next time you load your washing machine, remember that a little care goes a long way in preserving the lifespan of your beloved fabrics.

So, what are you waiting for? Visit our website Digi2lstore.com for second hand refurbished washing machines. Happy shopping!!!

DIY Appliance Refurbishment: Step-by-Step Instructions for Beginners

“DIY Appliance Refurbishment: Step-by-Step Instructions for Beginners” is a comprehensive guide designed to empower novices with the knowledge and confidence to refurbish old appliances on their own. The overview covers every aspect of the refurbishment process, from initial assessment to final touches and maintenance. The guide begins by emphasizing the importance of assessing the appliance’s condition, highlighting the need to identify visible damage, missing parts, or malfunctions. Researching the make and model of the appliance follows, helping beginners understand its specifications and unique features, which is crucial for sourcing replacement parts. Safety is paramount throughout the refurbishment process, with a strong emphasis on precautions such as disconnecting power sources and using protective gear. The guide stresses the importance of thorough cleaning to remove dirt, grime, and buildup, setting the stage for effective repairs and upgrades. Repairing and upgrading components is a significant focus, with detailed instructions on inspecting for wear or damage and replacing faulty parts with new ones. The guide encourages beginners to consider upgrading certain components to improve efficiency and functionality, such as outdated controls with newer, more energy-efficient models. Testing the refurbished appliance is emphasized to ensure everything functions correctly before proceeding to final touches. The overview highlights the importance of giving the appliance a final inspection and touch-up, including replacing missing or damaged cosmetic parts and applying protective coatings. Finally, the guide concludes with advice on maintenance and care to ensure the longevity of the refurbished appliance. Beginners are encouraged to establish a regular maintenance routine, follow manufacturer guidelines, and avoid overloading or abusing the appliance. Overall, “DIY Appliance Refurbishment: Step-by-Step Instructions for Beginners” offers a comprehensive roadmap for beginners eager to tackle refurbishment projects. With clear instructions and practical tips, novices can embark on the journey of DIY appliance refurbishment with confidence, saving money, reducing waste, and enjoying the satisfaction of a job well done.

In a world where technology seems to evolve at lightning speed, it’s easy to overlook the potential of older appliances. Yet, with a little creativity, elbow grease, and know-how, you can breathe new life into these forgotten gems through DIY appliance refurbishment. Whether you’re looking to save money, reduce waste, or simply enjoy the satisfaction of a hands-on project, refurbishing appliances can be a rewarding endeavor. In this comprehensive guide, we’ll walk you through the step-by-step process of DIY appliance refurbishment, perfect for beginners eager to unleash their inner handyman.

Step 1 : Assess the appliance : Before diving into any refurbishment project, it’s essential to assess the condition of the appliance. Take note of any visible damage, missing parts, or malfunctions that need to be addressed. This initial assessment will help you identify the scope of the refurbishment and determine which repairs or upgrades are necessary.

Step 2 : Research and gather supplies : Once you’ve assessed the appliance, it’s time to research the make and model to understand its specifications and unique features. This information will be invaluable when sourcing replacement parts and troubleshooting issues. Next, gather the necessary tools and supplies for the refurbishment project. Basic tools like screwdrivers, pliers, wrenches, and wire cutters are essential, along with replacement parts, cleaning supplies, and safety gear.

Step 3 : Safety first : Before you begin any refurbishment work, prioritize safety. Disconnect the appliance from power sources and ensure proper ventilation in your workspace. Use protective gear such as gloves and safety glasses to protect yourself from sharp edges, electrical hazards, and harmful chemicals.

Step 4 : Cleaning : Start the refurbishment process by thoroughly cleaning the appliance inside and out. Remove any dirt, grime, and buildup using appropriate cleaning agents and techniques. Pay special attention to hard-to-reach areas like vents, coils, and crevices, as these can harbor bacteria and affect the appliance’s performance.

Step 5 : Repairs and upgrades : With the appliance cleaned and prepped, it’s time to tackle repairs and upgrades. Carefully inspect each component for signs of wear or damage, focusing on critical areas like motors, belts, seals, and electrical connections. Replace any faulty parts with new ones, ensuring compatibility and proper installation. Consider upgrading certain components to improve the appliance’s efficiency or functionality, such as replacing outdated controls with newer, more energy-efficient models.

Step 6 : Testing : Once all repairs and upgrades are complete, test the appliance to ensure everything is in working order. Plug it in and run a few test cycles to verify that all components are functioning correctly. Pay attention to any unusual noises, smells, or performance issues, as these may indicate underlying problems that need to be addressed.

Step 7 : Final touches : With the refurbishment complete, give the appliance a final inspection and touch-up. Replace any missing or damaged cosmetic parts, such as knobs, panels, or decals, to restore its appearance. Polish metal surfaces and apply a protective coating to prevent future rust or corrosion. Take pride in your work and admire the transformation of your refurbished appliance.

Step 8 : Maintenance and care : To ensure your refurbished appliance continues to perform optimally, establish a regular maintenance routine. Clean and inspect the appliance periodically, checking for signs of wear or damage and addressing any issues promptly. Follow manufacturer guidelines for proper use and maintenance, and avoid overloading or abusing the appliance to extend its lifespan.

DIY appliance refurbishment offers a cost-effective and rewarding way to breathe new life into old appliances. With the step-by-step instructions outlined in this guide, beginners can confidently tackle refurbishment projects, saving money, reducing waste, and enjoying the satisfaction of a job well done. So roll up your sleeves, gather your tools, and embark on the journey of DIY appliance refurbishment – your wallet and the planet will thank you!

Prons and cons of having a mini Air conditioner

Mini air conditioners offer both advantages and limitations, catering to specific needs and preferences. Their portability and compact size make them convenient for moving between rooms or even while traveling. Additionally, they are energy-efficient, consuming less power compared to larger units, which can lead to cost savings, especially in smaller spaces. Moreover, mini air conditioners are generally more affordable upfront and require minimal maintenance, contributing to their cost-effectiveness. However, these units have constraints that should be considered. Their cooling capacity is limited, making them suitable for small areas but inadequate for larger spaces. Some models can produce noise, particularly those with compressors, which may disrupt quiet environments like bedrooms or offices. Moreover, mini air conditioners may lack advanced features found in larger units, such as programmable settings or air purifiers. While maintenance requirements are relatively low, regular cleaning of filters and coils is still necessary for optimal performance. When deciding whether a mini air conditioner is suitable, factors such as individual needs, space size, and budget must be taken into account. They are ideal for cooling small areas or providing supplemental cooling but may not meet the demands of larger rooms or consistently warm climates. Consequently, individuals living in cooler or moderate climates who require occasional or small-space cooling during warmer months may find mini air conditioners suitable. Conversely, larger units like split and window air conditioners are better suited for regions with consistently warm temperatures and larger cooling needs. By understanding the advantages and limitations of mini air conditioners, consumers can make informed decisions about their cooling solutions. Considering factors such as geographical location, cost, maintenance requirements, and usage preferences empowers individuals to select the most suitable option for their needs, ensuring comfort and satisfaction.  

Having a mini air conditioner, like any home appliance, comes with its own set of pros and cons:

Pros :

  • Portability : Mini air conditioners are typically lightweight and compact, making them easy to move from one room to another or even take with you when traveling.
  • Energy efficiency : They consume less energy compared to larger air conditioning units, which can help lower electricity bills, especially if you’re only cooling a small space.
  • Cost effective : Mini air conditioners are generally more affordable to purchase upfront compared to larger units. They also tend to require less maintenance and have lower repair costs.
  • Easy installation : Most mini air conditioners are designed for simple installation, often requiring only a power outlet and minimal assembly.
  • Zoning : They allow you to cool specific areas or zones within your home or office, providing personalized comfort without having to cool the entire space.


Cons :


  • Limited cooling capacity : Mini air conditioners are suitable for cooling small areas or individual rooms but may struggle to effectively cool larger spaces.
  • Noise level : Some mini air conditioners can be noisy, especially if they use a compressor. This can be disruptive, particularly in quiet environments like bedrooms or offices.
  • Limited features : Due to their smaller size, mini air conditioners may lack advanced features such as programmable settings, air purifiers, or dehumidifiers that larger units offer.
  • Maintenance requirements : While they generally require less maintenance than larger units, mini air conditioners still need regular cleaning of filters and coils to maintain efficiency and air quality.
  • Aesthetics : Depending on your preferences, the appearance of a mini air conditioner may not blend well with your interior decor, especially if you have a specific design aesthetic in mind.


     Overall, whether a mini air conditioner is suitable for you depends on your specific needs, the size of the space you want to cool, and your budget. They can be a convenient solution for cooling small areas or providing supplemental cooling in addition to central air conditioning systems.


Considering all the cooling capacity of these types of air conditioners, it can be considered that they are most suitable for people living in cool or cold geographical regions, which require little or small spaced room cooling during the summery seasons, during short intervals. Whereas the larger versions of the air conditioners, in the shape of split and window air conditioners are the basic requirements, for people living in warm plains, experiencing all the seasons in their extremes.


Considering all the above factors and details mentioned in this blog, Digi2l hopes and believes that our audience are now in a better position to make the best choices concerning their purchase of air conditioners, in terms of the geographical, cost, seasonal, usage, maintenance and other requirements. We sincerely hope that our esteemed audience finds this blog useful and educative enough in making the right choices in their lives. Happy shopping!!!

Let’s learn to disinfect our home appliances & know some eco-friendly DIY recipes for the same too!

Disinfecting home appliances is a crucial aspect of maintaining a clean and healthy living environment, especially in high-touch areas prone to accumulating germs and bacteria. Each household appliance requires specific care and cleaning methods to ensure effective disinfection without causing damage. Starting with the refrigerator, it’s essential to unplug the appliance, remove all food items and shelves, wash them with warm, soapy water, and then wipe down the interior surfaces with a suitable disinfectant solution. This ensures that any lingering bacteria or spills are thoroughly cleaned, promoting food safety and preventing unpleasant odors. Microwaves can be disinfected by wiping down the exterior surfaces with a disinfectant solution and using steam to loosen food particles inside. Ovens and stoves require following the manufacturer’s instructions for cleaning, including removing grates and burner covers, and using appropriate cleaners to ensure a thorough disinfection. Similarly, dishwashers and washing machines need regular cleaning to prevent mold and bacteria buildup. This involves running cleaning cycles with specialized cleaners and wiping down the exteriors with disinfectant solutions to maintain hygiene and prevent foul odors. Even smaller appliances and electronics such as toasters, blenders, TV remotes, and game controllers require attention. It’s essential to unplug these devices before cleaning, wash removable parts with warm, soapy water, and wipe down exteriors with disinfectant solutions or wipes to remove germs and dirt effectively. For those interested in eco-friendly cleaning alternatives, homemade disinfectants using natural ingredients can be a great option. Vinegar and water solutions, hydrogen peroxide mixes, citrus-infused vinegar cleaners, tea tree oil sprays, lemon juice and baking soda scrubs, and essential oil disinfectant sprays are effective alternatives. These solutions harness the natural antimicrobial properties of ingredients like vinegar, tea tree oil, and essential oils while minimizing exposure to harsh chemicals and reducing environmental impact. By adopting these cleaning and disinfection practices, individuals can create a clean and healthy home environment while also promoting sustainability and eco-friendliness. It’s important to always read and follow manufacturer instructions and test homemade solutions on small areas before widespread use to ensure effectiveness and safety.


Disinfecting home appliances is essential for maintaining a clean and healthy environment, especially in high-touch areas. Here’s a general guide on how to disinfect various home appliances:

  • Refrigerator :
  • Turn off and unplug the refrigerator
  • Remove all the food items and shelves.
  • Wash the shelves and drawers with warm, soapy water.
  • Wipe down the interior surfaces with a disinfectant solution (mixing water and household bleach or using disinfectant wipes).
  • Allow everything to air dry before placing the shelves and food back inside.
  • Microwave :
  • Wipe down the exterior with a disinfectant solution or disinfectant wipes.
  • For the interior, place a bowl of water with lemon slices or vinegar inside and microwave it for a few minutes to create steam. This will help loosen any food particles.
  • Carefully remove the bowl and wipe down the interior surfaces with a damp cloth or disinfectant wipes.
  • Pay attention to the keypad and handle, as they are high touch areas.
  • Oven/Stove :
  • Follow the manufacturer’s instructions for cleaning.
  • For the stovetop, remove grates and burner covers and wash them with warm, soapy water.
  • Wipe down the exterior and interior surfaces with a suitable oven cleaner or a mixture of baking soda and water.
  • For electric stoves, make sure to clean around the knobs and control panel.
  • Dishwasher :
  • Clean the filter according to the manufacturer’s instructions.
  • Run a cleaning cycle with a dishwasher cleaner or a cup of vinegar placed on the top rack.
  • Wipe down the exterior with a disinfectant solution or wipes, paying attention to the handle and control panel.
  • Washing machine :
  • Clean the detergent dispenser and door seal with warm, soapy water.
  • Run a cleaning cycle with hot water and a washing machine cleaner or a cup of vinegar.
  • Wipe down the exterior and control panel with a disinfectant solution or wipes.
  • Small appliances (toaster, blender, coffee maker etc) :
  • Unplug the appliance before cleaning.
  • Wash removable parts with warm, soapy water.
  • Wipe down the exterior with a disinfectant solution or wipes.
  • Pay attention to buttons, handles, and knobs, as they are high-touch areas.
  • Small electronics (TV remotes, game controllers etc) :
  • Use disinfectant wipes or a cloth dampened with a disinfectant solution to wipe down surfaces.
  • Pay attention to buttons and crevices where dirt and germs can accumulate.


Remember to always read and follow the manufacturer’s instructions for cleaning and disinfecting specific appliances to avoid damaging them.

Creating eco-friendly disinfectants for old home appliances is a great way to clean effectively while minimizing your environmental impact. Since Digi2l believes and strives in achieving green and eco friendly initiatives, we love to share here are some DIY recipes using natural ingredients:


  • Vinegar and water solution :
  • Mix equal parts of white vinegar and water in a spray bottle.
  • Vinegar is naturally antimicrobial and helps to disinfect surfaces.
  • It’s safe to use on most surfaces, but avoid using it on marble or granite countertops.
  • Hydrogen Peroxide and water solution :
  • Mix 1 part hydrogen peroxide (3%) with 2 parts water in a spray bottle.
  • Hydrogen peroxide is a natural disinfectant that can kill bacteria, viruses, and mold.
  • It’s effective for cleaning kitchen and bathroom surfaces.
  • Citrus infused vinegar cleaner :
  • Fill a jar with citrus peels (lemon, lime, or orange).
  • Pour white vinegar over the peels until they are fully submerged.
  • Let the mixture sit for about two weeks to infuse.
  • Strain out the peels and dilute the infused vinegar with equal parts water before using.
  • This cleaner combines the antimicrobial properties of vinegar with the pleasant scent of citrus.
  • Tea tree oil spray :
  • Mix 1 teaspoon of tea tree oil with 1 cup of water in a spray bottle.
  • Tea tree oil has natural antimicrobial properties that can effectively kill germs.
  • It’s safe to use on most surfaces, but it’s always a good idea to test in a small area first.
  • Lemon juice and baking soda scrub :
  • Make a paste using lemon juice and baking soda.
  • Lemon juice has natural antibacterial properties and adds a fresh scent.
  • Baking soda is abrasive and helps to scrub away dirt and grime.
  • Use this paste to clean and disinfect surfaces like sinks, stovetops, and countertops.
  • Essential oil disinfectant spray :
  • Mix water with a few drops of essential oils like lavender, eucalyptus, or peppermint in a spray bottle.
  • Essential oils have antimicrobial properties and can add a pleasant fragrance to your homemade disinfectant.
  • Shake well before each use and spray onto surfaces, then wipe clean.


These homemade eco-friendly disinfectants are effective for cleaning home appliances and surfaces while reducing your exposure to harsh chemicals and minimizing environmental impact. Remember to label your bottles, keep them out of reach of children and pets, and test them on a small area before using them on sensitive surfaces.


Shedding Light on DIY Fridge Light Repair and Maintenance

Keeping your fridge in top condition is essential for preserving your food’s freshness and ensuring its longevity. One often overlooked aspect of fridge maintenance is its lighting system. The lights inside your fridge not only help you see what’s inside but also indicate whether the appliance is functioning correctly. However, like any other part of your fridge, these lights can malfunction or burn out over time. Fortunately, with some DIY know-how, you can easily repair and maintain your fridge lights without having to call in a professional. Understanding the basics of how your fridge’s lighting system works is the first step in effective maintenance. Most modern refrigerators use either LED or incandescent lights. LED lights are more energy-efficient and durable compared to traditional incandescent bulbs. However, regardless of the type of lighting your fridge uses, the repair and maintenance procedures are quite similar.

       When troubleshooting fridge light issues, start by checking the power supply. Ensure that the fridge is plugged in and receiving electricity. If the fridge is getting power but the lights are still not working, the next step is to inspect the bulbs themselves. For LED lights, look for signs of physical damage or discoloration, indicating a faulty bulb. Incandescent bulbs may have a broken filament or appear blackened when burnt out. Replacing a faulty bulb is a straightforward process. Begin by unplugging the fridge to avoid the risk of electric shock. Depending on your fridge model, you may need to remove a cover or housing to access the light bulb. Once exposed, simply unscrew the old bulb and replace it with a new one of the same type and wattage. Be sure to handle LED bulbs carefully to avoid damaging them. Sometimes, the issue may not be with the bulb itself but rather with the socket or wiring. Inspect the socket for any signs of damage or corrosion. If the socket is damaged, it will need to be replaced. Similarly, check the wiring for any breaks or loose connections. Tighten any loose connections and replace any damaged wires as necessary. Preventive maintenance can also help prolong the life of your fridge lights. Regularly cleaning the interior of your fridge can prevent dust and debris from accumulating around the lights, which can cause them to overheat and fail prematurely. Additionally, checking the fridge’s temperature settings can help prevent excessive heat buildup, which can also affect the lifespan of the lights. While fridge lights may seem like a minor component, they play a crucial role in maintaining the functionality of your appliance. By familiarizing yourself with the basics of fridge light repair and maintenance, you can save time and money by addressing issues on your own. Remember to prioritize safety when performing any DIY repairs and always consult a professional if you’re unsure about any aspect of the process. With proper care and attention, your fridge lights can continue to illuminate your food for years to come.


The humble refrigerator is the unsung hero of the kitchen, tirelessly preserving our perishables day in and day out. But what happens when the light inside your fridge flickers or fails? While it might seem like a minor inconvenience, a malfunctioning fridge light can be frustrating and even impact your ability to locate items efficiently. Fear not, as we delve into the world of do-it-yourself (DIY) fridge light repair and maintenance, empowering you to shed light on the situation without breaking a sweat or the bank.

Understanding Fridge Lights:   Before we roll up our sleeves, let’s shed some light on how fridge lights work. Most refrigerators feature an incandescent or LED light bulb mounted inside the fridge compartment. These bulbs illuminate the interior when the fridge door is opened, allowing you to see and access your food easily. Over time, these bulbs may dim, flicker, or stop working altogether due to various factors such as age, electrical issues, or simply reaching the end of their lifespan.

DIY Repair and Maintenance Tips:

  • Safety First : Always unplug your refrigerator before attempting any repairs to avoid the risk of electric shock.
  • Inspect the bulb : Start by inspecting the light bulb. If it’s a traditional incandescent bulb, look for signs of a burnt-out filament, such as a dark spot or a broken wire. For LED bulbs, check for any visible damage or discoloration.
  • Replace the bulb : If the bulb is visibly damaged or not functioning, it’s time for a replacement. Ensure you purchase a replacement bulb that is compatible with your refrigerator model. LED bulbs are becoming increasingly common due to their energy efficiency and longer lifespan.
  • Check the socket : Sometimes, the issue lies not with the bulb but with the socket. Inspect the socket for any signs of corrosion, loose connections, or damage. Clean the socket using a dry cloth or a small brush to remove any debris that may be affecting the connection.
  • Test the door switch : The fridge light is typically controlled by a door switch that activates when the door is opened. Use a multimeter to test the continuity of the door switch. If the switch fails to provide continuity when the door is open, it may need to be replaced.
  • Inspect the wiring : If the bulb and socket are in good condition and the door switch is functioning correctly, the issue may lie with the wiring. Inspect the wiring harness for any signs of damage, wear, or loose connections. Replace any damaged wiring or secure any loose connections to restore functionality.
  • Address electrical issues : If you suspect electrical issues such as a blown fuse or tripped circuit breaker, consult your refrigerator’s user manual or contact a qualified electrician for assistance. Attempting to repair electrical problems without the necessary expertise can be dangerous.
  • Regular cleaning and maintenance : To prevent future issues with your fridge light, incorporate regular cleaning and maintenance into your routine. Wipe down the interior of the fridge, including the light bulb and socket, to remove any dust, dirt, or food residue that could affect performance.


       A malfunctioning fridge light doesn’t have to leave you in the dark. With a bit of DIY know-how and some basic tools, you can troubleshoot and repair most issues with ease. By following these tips for DIY fridge light repair and maintenance, you can keep your refrigerator shining bright and your food easily accessible for years to come. Remember, safety always comes first, so if you’re unsure or uncomfortable with any aspect of the repair process, don’t hesitate to seek professional assistance. Hence, you know now the best way to handle your best home appliance, that is your loved refrigerator!

Washing and caring of the fabrics via the washing machine

Washing clothes requires different care depending on the fabric type to prevent damage. Cotton, known for its durability, can be washed in warm water with regular detergent using either a gentle or regular cycle. Wool, being more delicate, necessitates cold water and a wool-specific or delicate fabric detergent, with gentle cycle or hand washing to prevent shrinking or felting. Silk, extremely delicate, requires hand washing in cold water with mild detergent, avoiding wringing or twisting and laying flat to dry. Synthetics like polyester and nylon can be washed in warm water with regular detergent, benefiting from a gentle cycle. Linen, similar to cotton, is durable but may wrinkle easily, so it’s best to wash in cool to lukewarm water with a gentle detergent and promptly remove from the washer. Denim, known for its sturdiness, can be washed in cool to warm water with regular detergent, but avoid washing with delicate items. Delicate fabrics like lace or lingerie should ideally be hand washed in cold water with gentle detergent, or placed in a mesh laundry bag if using a washing machine.

Eco-friendly detergents offer a sustainable alternative, with various options suitable for different fabrics. Plant-based detergents, derived from natural, renewable ingredients, are biodegradable and suitable for cotton, synthetics, and delicates. Biodegradable detergents break down easily in the environment, reducing their impact on ecosystems and can be used for a wide range of fabrics. Hypoallergenic detergents are formulated to be gentle on the skin, free from harsh chemicals and fragrances, making them suitable for sensitive fabrics like silk and wool, as well as for people with allergies or sensitive skin. DIY detergents offer a customizable solution using simple ingredients like baking soda, washing soda, and castile soap. Soap nuts, a natural and biodegradable alternative to traditional detergent, can be used for all fabric types. Liquid detergent concentrates, requiring less packaging and water, offer an environmentally friendly option for washing various fabrics. When choosing eco-friendly detergents, certifications such as USDA Certified Bio based or EPA Safer Choice indicate adherence to environmental and safety standards. Considering factors like packaging, fragrance, and price can help find the best option for individual needs.

Washing different fabrics requires different care to avoid damaging them. Here’s a general guide:

  • Cotton : Cotton is quite durable and can typically be washed in warm water with a regular detergent. You can use either a gentle cycle or a regular cycle for cotton items.
  • Wool : Wool is more delicate and should be washed in cold water with a detergent specifically formulated for wool or delicate fabrics. Use the gentle cycle or hand wash wool items to prevent shrinking or felting.
  • Silk : Silk is very delicate and should be hand washed in cold water with a mild detergent. Avoid wringing or twisting silk items, instead gently press out excess water and lay flat to dry.
  • Synthetics ( Polyester, nylon etc ) : Synthetics can usually be washed in warm water with a regular detergent. They are generally more durable but still benefit from a gentle cycle to prolong their lifespan.
  • Linen : Linen can be washed in cool to lukewarm water with a gentle detergent. Like cotton, linen is quite durable but may wrinkle easily, so it’s best to remove promptly from the washer and hang or lay flat to dry.
  • Denim : Denim is sturdy and can typically be washed in cool to warm water with a regular detergent. You can use a regular cycle, but avoid washing with delicate items that might be damaged by the rough texture of denim.
  • Delicates : For delicate fabrics like lace or lingerie, it’s best to hand wash in cold water with a gentle detergent. If you must use a washing machine, place delicate items in a mesh laundry bag to protect them from snagging or stretching.


        Always check the care label on your clothing for specific washing instructions, as some items may have special requirements. Additionally, when in doubt, it’s often safer to err on the side of caution and choose a gentler washing method to avoid damaging your clothes.


Now let us know about the types of eco friendly detergents can be used to wash the different fabrics in the washing machine. There are several eco-friendly detergent options available for washing different fabrics in the washing machine. Here are some examples:

  • Plant based detergents : These detergents are made from natural, renewable plant-based ingredients, making them biodegradable and environmentally friendly. They are suitable for washing various fabrics, including cotton, synthetics, and delicates. The examples of plant based detergents are : Seventh generation, Ecover, Mrs Meyer’s clean day, Method, Biokleen, Puracy. These are just a few examples of plant-based laundry detergents available on the market. When choosing a detergent, be sure to read the ingredients list and look for certifications like USDA Certified Biobased or EPA Safer Choice to ensure that the product meets your eco-friendly criteria.
  • Biodegradable detergents : These detergents are designed to break down easily in the environment, reducing their impact on waterways and ecosystems. Look for options labeled as biodegradable, which can be used for washing a wide range of fabrics. The examples of biodegradable detergents are : Attitude little ones laundry detergent, Dr Bronner’s sal suds biodegradable cleaner, Rockin green classic rock laundry detergent. These are just a few examples of biodegradable laundry detergents available on the market. When choosing a detergent, look for products that are certified as biodegradable by reputable organizations or that display eco-friendly labels to ensure their environmental credentials.
  • Hypoallergenic detergents : Hypoallergenic detergents are formulated to be gentle on the skin and free from harsh chemicals and fragrances. They are suitable for washing sensitive fabrics like silk and wool, as well as for people with allergies or sensitive skin. The examples of hypoallergenic detergents are : Tide free and gentle,

All free clear, Arm & hammer sensitive skin free & clear, Seventh generation free & clear, ECOS hypoallergenic laundry detergent, Dreft stage 1: Newborn liquid detergent. 

      These are just a few examples of hypoallergenic detergents available on the market. When choosing a detergent for sensitive skin, it’s important to look for products that are free from fragrances, dyes, and harsh chemicals and that are dermatologist-tested to ensure their safety and effectiveness.

  • DIY detergents : You can make your own eco-friendly detergent using simple ingredients like baking soda, washing soda, and castile soap. There are many recipes available online for homemade laundry detergent that can be customized to suit your needs and preferences. In one of our previous blogs, we have mentioned the ways to prepare your own DIY detergents, you can check them out there!
  • Soap nuts : Soap nuts are the dried shells of the soapberry fruit, which contain natural saponins that act as a gentle cleanser. They are a natural and biodegradable alternative to traditional detergent and can be used for washing all types of fabrics.
  • Liquid detergent concentrates : Some brands offer concentrated liquid detergents that require less packaging and water to produce. These detergents are often more environmentally friendly than traditional liquid detergents and can be used for washing various fabrics.

     When choosing an eco-friendly detergent, look for certifications such as the USDA Certified Bio based label or the EPA Safer Choice label, which indicate that the product meets certain environmental and safety standards. Additionally, consider factors like packaging, fragrance, and price to find the best option for your needs.


Refurbishing Vintage Appliances: Bringing Old Favorites Back to Life

“Refurbishing Vintage Appliances: Bringing Old Favorites Back to Life” delves into the timeless allure of vintage appliances and the art of refurbishing them. Vintage appliances evoke nostalgia with their classic designs and durable construction, standing as cherished relics of bygone eras. However, refurbishing these old favorites presents unique challenges, including sourcing rare parts and addressing extensive wear and tear. Despite these challenges, refurbishing vintage appliances can be a rewarding endeavor. The process typically involves thorough assessment, research, cleaning, repairs, restoration, testing, and final touches. Each step requires attention to detail and a commitment to preserving the appliance’s original charm. The blog emphasizes the importance of starting small for beginners and encourages documenting the refurbishment process with photographs. It advises investing in quality tools and seeking help from experienced DIYers or professionals when needed. Patience is key, as refurbishing vintage appliances can be time-consuming but ultimately gratifying. The overarching message of the blog is that refurbishing vintage appliances is more than just restoring old machines; it’s about preserving history and celebrating timeless craftsmanship. By breathing new life into these old favorites, we honor the past while embracing the future. Refurbished vintage appliances become cherished heirlooms, enriching homes with their character and functionality for years to come.

In a world where new appliances flood the market every year, there’s something undeniably charming about vintage appliances. Whether it’s the sturdy craftsmanship, the retro design, or the nostalgia they evoke, vintage appliances hold a special place in many hearts. However, as time passes, these beloved relics may start to show signs of wear and tear, leaving their owners faced with a dilemma: to discard or refurbish? In this blog, we’ll explore the art of refurbishing vintage appliances, breathing new life into these old favorites and preserving their unique charm for generations to come.

The allure of vintage appliances

Vintage appliances have a timeless appeal that transcends trends and fads. From classic refrigerators and stoves to iconic mixers and toasters, these pieces evoke a sense of nostalgia for a bygone era. Their sturdy construction and attention to detail stand in stark contrast to the mass-produced appliances of today, making them cherished heirlooms in many households.

                                       The challenges of refurbishing vintage appliances

Refurbishing vintage appliances comes with its own set of challenges. Unlike modern appliances, which often have readily available replacement parts and standardized components, vintage appliances may require more extensive repairs and restoration work. Additionally, sourcing original or compatible parts can be a daunting task, especially for rare or obscure models.

The Refurbishment process : Despite the challenges, refurbishing vintage appliances can be a rewarding endeavor for DIY enthusiasts and restoration experts alike. Here’s a step-by-step overview of the refurbishment process:

  • Assessment : Begin by assessing the condition of the vintage appliance. Identify any visible damage, missing parts, or malfunctions that need to be addressed.
  • Research : Research the make and model of the appliance to understand its specifications and unique features. This information will be invaluable when sourcing replacement parts and troubleshooting issues.
  • Cleaning : Thoroughly clean the appliance inside and out to remove dirt, grime, and rust. Use gentle cleaning agents and techniques to avoid damaging delicate surfaces.
  • Repairs : Carefully inspect each component of the appliance for signs of wear or damage. Repair or replace any faulty parts, such as motors, switches, or wiring, using original or compatible replacements whenever possible.
  • Restoration : Restore the appliance to its original glory by refurbishing cosmetic elements such as knobs, handles, and finishes. Sanding, painting, and polishing can help rejuvenate worn or tarnished surfaces.
  • Testing : Test the refurbished appliance to ensure that all repairs and adjustments have been successful. Check for proper functionality and safety before returning the appliance to use.
  • Final Touches : Give the appliance a final inspection and touch-up to address any remaining imperfections. Replace missing or damaged cosmetic parts to complete the refurbishment process.

                                 Tips and tricks for successful refurbishment


Refurbishing vintage appliances requires patience, attention to detail, and a willingness to get your hands dirty. Here are some tips and tricks to help you along the way:

  • Start small : If you’re new to appliance refurbishment, start with smaller, less complex projects before tackling larger appliances like refrigerators or stoves.
  • Take pictures : Take pictures throughout the refurbishment process to document your progress and help you remember how everything goes back together.
  • Use the right tools : Invest in high-quality tools and equipment to make the refurbishment process easier and more efficient. Having the right tools for the job can make all the difference.
  • Be Patient : Refurbishing vintage appliances can be a time-consuming process, so be patient and don’t rush through the repairs. Take breaks when needed to avoid frustration and burnout.
  • Seek help when needed : Don’t hesitate to seek help or advice from experienced DIYers, appliance repair professionals, or online communities. They can offer valuable insights and guidance to help you overcome challenges and achieve the best results.

                                   Preserving the past, embracing the future

Refurbishing vintage appliances is not just about restoring old machines; it’s about preserving a piece of history and embracing the timeless craftsmanship of days gone by. By breathing new life into these old favorites, we honor the past while embracing the future. So the next time you come across a vintage appliance in need of some TLC, don’t see it as a lost cause – see it as an opportunity to bring a piece of history back to life. With a little elbow grease and a lot of love, you can transform an old relic into a cherished heirloom that will be enjoyed for years to come.

The Ultimate Guide to Refurbishing Appliances: Tips and Tricks

In today’s fast-paced world, where technology advances rapidly, appliance refurbishment emerges as a sustainable and cost-effective solution. This comprehensive guide explores the benefits, process, and essential tips for successfully refurbishing household appliances. Understanding appliance refurbishment involves restoring used or damaged appliances to a like-new condition, both in terms of functionality and appearance. This process encompasses cleaning, repairing, and sometimes upgrading various components to ensure optimal performance. The benefits of appliance refurbishment are manifold. Not only does it offer significant cost savings compared to purchasing new appliances, but it also reduces electronic waste and extends the lifespan of existing appliances. Additionally, refurbishment provides an opportunity for customization, allowing users to upgrade features or enhance aesthetics according to their preferences. Successful appliance refurbishment requires careful planning and execution. It begins with assessing the condition of the appliance and gathering the necessary tools and replacement parts. Safety is paramount throughout the process, with precautions such as disconnecting power sources and using protective gear. Thorough cleaning is essential before inspecting and repairing any damaged components. Upgrading certain parts can improve efficiency and performance, while testing before reassembly ensures everything functions correctly. Attention to detail extends to the final touches, including cosmetic repairs and documentation of the refurbishment process.

     Proper waste disposal is crucial to minimize environmental impact, with recycling and donation of reusable components encouraged. The appliance refurbishment offers a sustainable alternative to constant appliance replacement. By following the tips and guidelines outlined in this overview, individuals can extend the lifespan of their appliances, save money, and contribute to a greener future.

In today’s fast-paced world, where technology seems to advance at the speed of light, it’s easy to succumb to the temptation of constantly upgrading our appliances. However, what if there was a way to breathe new life into our existing appliances, saving both money and resources? Enter appliance refurbishment – a sustainable and cost-effective solution that not only extends the lifespan of our appliances but also reduces our environmental footprint. In this ultimate guide, we’ll explore everything you need to know about refurbishing appliances, including tips, tricks, and step-by-step instructions.

Understanding Appliance refurbishment

Appliance refurbishment involves restoring used or damaged appliances to a like-new condition, both in terms of functionality and appearance. This process typically includes cleaning, repairing, and sometimes upgrading various components to ensure optimal performance. From refrigerators and washing machines to ovens and dishwashers, virtually any household appliance can be refurbished with the right knowledge and tools.

The benefits of appliance refurbishment :  Before diving into the refurbishment process, let’s first explore why refurbishing appliances is worth considering:

  • Cost savings : Refurbishing appliances is often significantly cheaper than purchasing brand new ones, saving you hundreds or even thousands of dollars.
  • Environmental impact : By refurbishing appliances instead of discarding them, you help reduce electronic waste and minimize the demand for new resources.
  • Extended lifespan : Refurbishing can extend the lifespan of your appliances, allowing you to enjoy their benefits for many more years.
  • Customization : Refurbishment provides an opportunity to customize your appliances to better suit your needs, whether it’s upgrading features or enhancing aesthetics.


Tips and tricks for successful appliance refurbishment

Now that we understand the benefits of appliance refurbishment, let’s delve into some tips and tricks to ensure a successful refurbishment project:


  • Assess the condition : Before starting any refurbishment project, carefully assess the condition of the appliance. Identify any visible damage or malfunctions that need to be addressed.
  • Research and gather the supplies : Research the specific make and model of your appliance to understand its components and potential issues. Gather the necessary tools and replacement parts before starting the refurbishment process.
  • Safety first : Always prioritize safety when refurbishing appliances. Disconnect the appliance from power sources and ensure proper ventilation in the workspace. Use protective gear, such as gloves and safety glasses, when handling sharp or hazardous materials.
  • Clean thoroughly : Start the refurbishment process by thoroughly cleaning the appliance inside and out. Use appropriate cleaning agents and techniques to remove dirt, grime, and buildup from surfaces and components.
  • Inspect and repair : Carefully inspect each component of the appliance for signs of wear or damage. Replace any faulty parts, such as motors, belts, or seals, to ensure optimal performance.
  • Upgrade wisely : Consider upgrading certain components or features of the appliance to improve its functionality or efficiency. For example, replacing outdated controls with newer, more energy-efficient models can enhance performance while reducing energy consumption.
  • Test before reassembly : Before reassembling the appliance, test each repaired or replaced component to ensure it functions correctly. This will help identify any issues that may need further attention before completion.
  • Final touches : Once all repairs and upgrades are complete, give the appliance a final inspection and touch-up. Replace any missing or damaged cosmetic parts, such as knobs or panels, to restore its appearance.
  • Document and maintain : Keep detailed records of the refurbishment process, including any repairs or upgrades performed and replacement parts used. This documentation will be valuable for future reference and maintenance.
  • Dispose of waste responsibly : Properly dispose of any waste generated during the refurbishment process, including old parts and packaging materials. Recycle or donate reusable components whenever possible to minimize environmental impact.


              Appliance refurbishment offers a sustainable and cost-effective alternative to constantly replacing household appliances. By following the tips and tricks outlined in this guide, you can breathe new life into your appliances while saving money and reducing your environmental footprint. Whether you’re a seasoned DIY enthusiast or a novice looking to tackle your first refurbishment project, remember that patience, attention to detail, and a commitment to safety are key to success. So roll up your sleeves, gather your tools, and embark on the journey of appliance refurbishment – your wallet and the planet will thank you!


× How can I help you?